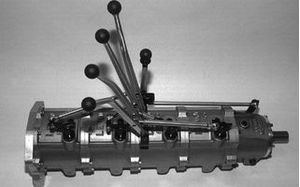
How to Attach Gearbox to Engine after Repair
If you independently perform complex repair operations on the transmission (which usually involve the transmission tear-down), you can face some difficulties at the stage of reassembly, namely, when it comes to connection of the gearbox to the engine. In the article, we will consider the question of how to attach manual as well as automatic gearboxes to the car engine.

Manual transmission
arrangement

Automatic transmission
arrangement
Firstly, it should be noted that the process of the manual gearbox (as well as semi-automatic gearboxes) attachment to the car engine is somewhat different from a similar procedure performed for the automatic transmission. Manual and semi-automatic gearboxes are quite similar in terms of design; therefore these gearboxes are attached to the car engine in the same manner. However, if we talk about automatic transmissions, the installation of these units involves a number of peculiarities.
How to attach manual transmission to engine
So, let’s start with the manual transmission
attachment to the engine using the example of Hyundai Getz. First of all, it is
necessary to lift the front axle of the car. It is desirable to invite an
assistant before starting the work, but it is also possible to do it by yourself.
After lifting the car, you have to remove the intermediate steering link,
because this element will impede the process of the engine and the gearbox
pairing.
After that, you also need to remove the gearshift lever, and the opening should be covered/closed with a piece of cloth or masking tape. It must be noted that after the gearbox installation, the lever would be mounted from the passenger compartment, so you should clearly understand how this element is installed back in the gearbox. Before removing the gearshift lever, you also need to engage the 4-th gear. In case you also remove the clutch unit, it is necessary to perform the center alignment of the driven plate relative to the mounting bearing. It can be performed thanks to the input shaft removal. If you don’t do it, you won’t be able to install the input shaft during the reassembly.
The next step is to loosen the bolts on the engine mounts, by loosening the screw nuts that hold metal brackets. It is necessary to have the possibility to position the engine at a certain angle without the risk to damage the engine mounts. Then, the front part of the engine is slightly lifted before the gearbox installation. As a result, the rear part (area of the clutch installation) is descended a little, and then it will be possible to attach the gearbox to the engine in the process of the reassembly.
Check out two videos
on how to install the manual transmission back in the car
It is important to prepare in advance all the
necessary tools and fasteners required for the abovementioned operations. Now
you can proceed to the phase of the gearbox-to-engine attachment. If you have
never performed this operation before, then carefully read the following
recommendations:
- You need to be prepared to lie down on your back, get under the car and hold the gearbox with your hands. The task is to get the input (primary) shaft into the clutch driven plate;
- Then, it is necessary to rotate the gearbox a bit, so that you manage to connect the input shaft splines to the splines of the driven plate;
- After you connect the splines, you can move the gearbox towards the engine with a little effort. However, certain difficulties may occur with the guide bushings;
- After the installation, tighten one or a couple of bolts to prevent the gearbox from disconnection. Then, you should tighten all remaining fasteners with the necessary effort and in the right order (the information can be found in the manual).
Automatic transmission attachment to engine
Taking into account that automatic
transmissions do not have a classic clutch and differ in design from manual and
semi-automatic transmissions, the procedure of the automatic transmission
connection to the engine will obviously have some peculiarities.
First of all, it is necessary to attach the
torque converter (which performs the clutch function) to the input shaft of the
gearbox; this part must be accurately mounted on its place (be careful do not
damage the seal). It must be noted that the torque converter should be
sufficiently lubricated before the attachment to the input shaft. Be sure that
the torque converter is properly fastened to the gearbox housing.
When the gearbox is lifted for installation, you must ensure that the torque converter is attached rigidly. To prevent the torque converter from falling, the gearbox should be lifted at an angle. Then, the attaching holes on the torque converter are mated with matching holes on the flex plate. Further assembly is performed by tightening all the bolts (in the centering bushings) with the appropriate torque. Then, you have to connect drives, hoses, etc. And finally, you have to check that the torque converter rotates freely.
Great videos about the
automatic transmission attachment to the engine
.
Tips and
recommendations
When you install manual and automatic
transmissions and attach them to engines, you have to follow some
recommendations. Firstly, it is necessary to check the rear crankshaft oil seal
for leaks. If you notice even the slightest signs of leakage, the oil seal must
be immediately replaced, otherwise the problem will get worse and you will need
to remove the gearbox later again.
Useful video on how to deal with rear crankshaft oil seal for leaks
As for the automatic transmission, this complex
unit has a separate radiator cooling system. It is necessary to ensure that this
system is not contaminated. The radiator itself is washed by feeding gasoline
or a similar cleaner via a tube, allowing you to remove shavings, deposits, and
other debris.
You also need to pay attention to the
availability of two special guide bushings between the engine and the gearbox.
If there is only one bushing or they are missing altogether, then sooner or
later the oil pump bushing of the automatic transmission will fail, resulting
in ATF leakages from the junction point of the gearbox and the engine. As a
result, the gearbox will need to be removed, and it is likely that you will
have to replace the oil pump. It is recommended to flush and clean all contact
elements and electrical connectors that were previously disconnected when
removing the gearbox.
The gearbox case must be attached to the engine without any difficulties, In case with automatic transmissions, it is especially important. When you ensure that both components are properly connected, you can tighten units with bolts. But, for example, if the automatic gearbox bumps with the torque converter into the drive plate (or into the flywheel in case with the manual transmission), then you must not tighten the bolts. Otherwise, you can damage the oil pump of the automatic transmission, or other elements depending on the transmission type.
Learn how to check the
level of transmission fluid
Finally, after the reassembly completion, it is desirable to check the level of transmission fluid. With manual and semi-automatic transmission this task is very simple. You just need to park the car at an even running surface and to open the oil level plug. If the fluid flows out, then the level is normal. Some cars equipped with manual or semi-automatic gearboxes have a separate oil dipstick. As for automatic transmissions, the oil level should be checked only after the engine has been warmed up to operating temperatures (it is also important to warm-up the automatic gearbox itself). The transmission fluid check is performed only when the engine is running


